Source: http://amronbadriza.blogspot.com/2012/06/cara-memberi-burung-twitter-terbang-di.html#ixzz2Cjh0y8gV

Minggu, 06 Januari 2013

Numeric Textbox 2 Decimal places

I am hoping this is not inappropriate to do on here if it is I apologize in advance and will let the thread die a slow agonizing death.
Here goes:
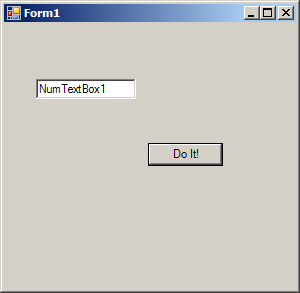
I have a little TextBox app that's supposed to only allow numeric’s positive and negative and allow 2 decimal places. I have tested it and it seems to work as intended. What I'd like is for you all to try and break it. The max characters functionality needs some work but it's not the focus of my TextBox.
Numbers_Only_Form
  1. 'K. W. 4/19/2012
  2. 'TextBox Control For
  3. 'Numerics/Money entry
  4. '1 Decimal Point
  5. '2 Decimal Places
  6. 'Allows The BackSpace
  7. 'Handles enter key by Moving to the Next control
  8. 'Set Max characters checked - this sets it to 4 if not checked allows 10 characters
  9. 'The button just multiplies the textbox value by 5
  10. Public Class Form1
  11. Private maxSize As Boolean = False
  12. Private numMaxSize As Integer
  13. Private Sub Button1_Click(ByVal sender As System.Object, ByVal e As System.EventArgs) Handles Button1.Click
  14. If T1.Text <> "" Then
  15. If CDbl(T1.Text) > 0 Or CDbl(T1.Text) < 0 Then
  16. MsgBox(CDbl(T1.Text) * 5)
  17. T1.Clear()
  18. End If
  19. End If
  20. GetNextControl(Button1, False).Focus()
  21. End Sub
  22. Private Sub Form1_Load(ByVal sender As System.Object, ByVal e As System.EventArgs) Handles MyBase.Load
  23. 'Add Handler for all the Numeric only TextBoxes on the Form
  24. For Each ctrl As Control In Me.Controls
  25. If TypeOf ctrl Is TextBox Then
  26. AddHandler ctrl.KeyPress, AddressOf Boxkeypress
  27. End If
  28. Next ctrl
  29. T1.MaxLength = 10
  30. End Sub
  31. Private Sub Boxkeypress(ByVal sender As Object, ByVal e As KeyPressEventArgs)
  32. Dim txt As TextBox = CType(sender, TextBox)
  33. If Not Char.IsDigit(e.KeyChar) Then e.Handled = True
  34. If e.KeyChar = "." And txt.Text.IndexOf(".") = -1 Then e.Handled = False 'allow single decimal point
  35. If e.KeyChar = "-" And txt.SelectionStart = 0 Then e.Handled = False 'allow negative number
  36. 'Enter key move to next control
  37. If e.KeyChar = Chr(13) Then
  38. GetNextControl(txt, True).Focus()
  39. 'If only a decimal point is in the box clear TextBox
  40. If e.KeyChar = Chr(13) And txt.Text = "." Then txt.Clear()
  41. Exit Sub
  42. End If
  43. Dim i As Integer = txt.Text.IndexOf(".")
  44. Dim len As Integer = txt.Text.Length
  45. 'Allow only 2 Decimal places
  46. If Not e.Handled Then
  47. If i = -1 Then
  48. e.Handled = False
  49. Else
  50. If (len - i) > 2 Then e.Handled = True
  51. End If
  52. End If
  53. If e.KeyChar = Chr(8) Then e.Handled = False 'allow Backspace
  54. End Sub
  55. Private Sub chkMaxSize_CheckedChanged(ByVal sender As Object, ByVal e As System.EventArgs) Handles chkMaxSize.CheckedChanged
  56. If chkMaxSize.Checked Then
  57. maxSize = True
  58. T1.MaxLength = 4
  59. Else
  60. maxSize = False
  61. T1.MaxLength = 10
  62. End If
  63. End Sub
  64. End Class
  65.  
  66.  
  67. sumber : http://www.daniweb.com/software-development/vbnet/threads/434461/numeric-textbox-2-decimal-places

Re: only numbers in textbox

Posted 15 October 2008 - 06:03 PM
View Postjacobjordan, on 15 Oct, 2008 - 05:10 PM, said:
You were supposed to put that code in a KeyDown event, not a TextChanged Event. Create a KeyDown event for your text box, and put that same code in it. Like this:
1Private Sub TextBox1_KeyDown(ByVal sender As Object, ByVal e As System.Windows.Forms.KeyEventArgs) Handles TextBox1.KeyDown
2    If Asc(e.KeyChar) <> 13 AndAlso Asc(e.KeyChar) <> 8 _
3       AndAlso Not IsNumeric(e.KeyChar) Then
4            MessageBox.Show("Only Numbers")
5            e.Handled = True
6    End If
7End Sub


Same problem.

Attached image(s)

  • Attached Image

Extending a TextBox Control to add custom Properties VB.Net 2008

Posted by Frederick B. Ponce on March 10, 2010 at 9:35 PM
It's been so long that i wanted to write articles about my experience in programming but i never had the courage to do that until now but it comes to my mind that i must do this. it is now or never so here i am, writing my first article.

I've been writing programs since 2005 and i still remember one of the problem that i always encounter is the text validation in the text boxes. Normally, Textbox control does not have a property that will filter or validate the texts that are inputted inside it. For example, if you need to have a textbox that will strictly accept only numbers, you will have to put the codes shown below inside its keypress event:

VB.Net Code:

Private Sub TBox_KeyPress(ByVal sender As Object, ByVal e As KeyPressEventArgs)
Handles TBox.KeyPress

If Not IsNumeric(e.KeyChar) And Asc(e.KeyChar) <> 8 Then
e.Handled = True
End If

End Sub


or if you need it to accept characters only. you only have to modify some part of the codes shown above. it will turn out like this:

Private Sub TBox_KeyPress(ByVal sender As Object, ByVal e As KeyPressEventArgs)
Handles TBox.KeyPress

If IsNumeric(e.KeyChar) Then
e.Handled = True
End If

End Sub


We used the IsNumeric() function to restrict the text that is being inputted in the textbox. This function determines whether the text that is being entered in the textbox is numeric or not. Also, we include exclude the Backspace in the restriction that is why we have the code 'And Asc(e.KeyChar) <> 8' it is very important to always remember the Asc equivalent of each characters in the keyboard but for now, we only used Backspace(8) because it must be always excluded from the restriction.

Also if we need a certain procedure to run whenever we press the enter key while the cursor is in the Text box, we will have to add this code just before any code in the keypress event of the textbox.

 Private Sub TBox_KeyPress(ByVal sender As Object, ByVal e As KeyPressEventArgs)
Handles TBox.KeyPress

If Asc(e.KeyChar) = 13 Then
'Call the Procedure Here
End If

If IsNumeric(e.KeyChar) Then
e.Handled = True
End If

End Sub

There is a lot of method to do this restriction but this is the best way for me to do that. Anyway, this isn't really the problem that i always encounter. Imagine, if you have a lot of textboxes in your form that are needed to be filtered, you must type or copy and paste the codes to each keypress event?!

The solution that i've made before is to create a subprocedure to call in the keypress event of the textbox. Here's the code:

Private Sub NumericOnly(ByVal e As KeyPressEventArgs)
If Not IsNumeric(e.KeyChar) And Asc(e.KeyChar) <> 8 Then
e.Handled = True
End If
End Sub


and i will only have to call the sub procedure in the keypress event like this:

 
Private Sub TBox_KeyPress(ByVal sender As Object, ByVal e As KeyPressEventArgs)
Handles TBox.KeyPress
NumericOnly(e)
End Sub


The good thing with this is that i do not have to type the code again and again in each textbox. all i have to do is call the
sub procedure that i've created. but still i am not satisfied with this so i still tried to find a way until i learned things about
user controls.

User Controls are the controls which are created by the user and they are based on the class System.Windows.Forms.UserControl. Like standard controls, user controls support properties, methods and events. Once a user control is created it can be added to any form or any number of forms like all other controls.

  So this article is mainly about adding properties in a Text box control in Visual Basic. What we are going to do is inherit the Text box Class and create additional properties to the Text box.

The first property that we are going to add is the Text Filter wherein the Text box will only allow text based on the given filter parameter like NumericOnly or CharacterOnly.

  To create a user control select File->New->Project->Visual Basic Projects and select
Windows Control Library from the templates, name it as MyTextBox and click OK. The image below displays the new project dialogue to add a User Control project.


The form that opens after clicking OK looks like the image below. It looks similar to a normal form.
Well, we don't need this form so you can just remove it by right clicking on it in the Solution explorer and select 'delete'


The next thing that we are going to do is add a Class in the project. Right click on the project in the Solution explorer > Add > Class


A dialog box will appear, Name your class as xTextBox and click Ok
Now, we are ready to go coding!

This is the complete codes of your Class:

 
Public Class xTextBox
Inherits TextBox

Public Event OnEnterKeyPress()
Dim MyInput As Cinput

Public Property CharacterInput() As Cinput
Get
Return Me.MyInput
End Get
Set(ByVal value As Cinput)
Me.MyInput = value
End Set
End Property

Protected Overrides Sub OnKeyPress(ByVal e As System.Windows.Forms.KeyPressEventArgs)
MyBase.OnKeyPress(e)

 If Asc(e.KeyChar) = 13 Then
RaiseEvent OnEnterKeyPress()
 End If

 Select Case Me.MyInput

 Case Cinput.CharactersOnly
  If IsNumeric(e.KeyChar) Then
e.Handled = True
  End If
 Case Cinput.NumericOnly
  If Not IsNumeric(e.KeyChar) And Asc(e.KeyChar) <> 8 Then
e.Handled = True
  End If
End Select

 End Sub

End Class


Public Enum Cinput
 NumericOnly
 CharactersOnly
End Enum


Ok, let us discuss what we did in the codes above.

Inherits Textbox
First we Inherits the Textbox class so that we can use all of its properties and methods.

Public Event OnEnterKeyPress()
Next, we Declared a new event with the name OnEnterKeyPress. We will trigger this event each time the user press the Enter key while the cursor is inside the text box.

Dim MyInput As Cinput
We declare an instance of the Cinput. As you have noticed, we've created an enumeration with the name Cinput.
this is to allow the user to select only the items that belongs to the specific enumeration. This done to prevent invalid inputs from the user. For more info or tutorial about Enumeration, you can check out this site http://aspalliance.com/292


Public Property CharacterInput() As Cinput
Get
Return Me.MyInput
End Get
Set(ByVal value As Cinput)
Me.MyInput = value
End Set
End Property

Next, we've created this property to allow the user to specify what type of Character Input he would like to be filtered.
Based on the Enumeration, we only have two types of Input, NumericOnly and CharacterOnly. This is not limited to only two choices. You can add SymbolsOnly or whatever you want but make sure that you will specify the kind of restriction in the keypress event.


Protected Overrides Sub OnKeyPress(ByVal e As System.Windows.Forms.KeyPressEventArgs)
MyBase.OnKeyPress(e)
End Sub

  What we did is we overrides the keypress event of the inherited Text box Class so we can add codes in it. this is where we will put the codes that i have discussed at the beginning of this article.

If Asc(e.KeyChar) = 13 Then
RaiseEvent OnEnterKeyPress()
End If
This code simply Raise or Trigger the OnEnterKeyPress event whenever the user press the enter key.
Note: the Asc value of Enter key is (13).

The next codes are the one that i've discussed a while ago so i don't think i have to do it again so let's continue to the next step. Build the project by pressing ctrl+shift+b or Right click on the project and select Build


Once you are done, It is now time to test our newly created Control. Create a new visual basic project > Windows Form Application and click ok.


In the Toolbox, Right click on the General Tab and select Choose Item.


A dialog box will appear.


Click browse and locate the newly created MyTextBox.dll File Mostly if you are using VS2008, It can be found in >My Documents>Visual Studio 2008>Projects>'Name of the Solution'>'Name of the Project'>Bin>Debug


Click Open and then Ok. You'll notice that a new control with the name xTextBox is added in the General Tab of your Toolbox. This is the control that we have made a while ago.


Now, drag this control to your Form and go to its properties window. You will see that a new property  with the name 'CharacterInput' was added to the TextBox control. Show its content and you will see two contents of the enumeration that we have made before.


Leave the CharacterInput to Numeric Only and run the program by pression F5 or clicking the play icon in the tools menu. During runtime, try to enter numbers. The Text box accepted it right? Now, try to type any characters from A-Z, what happened? Amazing... LOL. Now stop the project and set the Character Input to CharactersOnly and run the project again. Basically it will again restrict the text input based on the given parameter.

Stop the program again and double click the TextBox control. The Code behind will show and in the upper right part of it, there is a dropdown containing all the events of the TextBox. Look for an event named: OnKeyEnterPress


Did you found it? indeed, we now have a new Textbox event that you cannot find from a normal Textbox Control. As you remember, this is the event that we have added a while ago in our xTextBox Class. Click this event and Visual Basic will Automatically generate a sub procedure for this event.

Now put the codes below inside the OnKeyPress event and run the program again.

MessageBox.Show("You Pressed Enter Key", "", MessageBoxButtons.OK, MessageBoxIcon.Information)


Make sure that the cursor is inside the Text box and then press Enter. You will see that each time you press the Enter key, the OnKeyPress event is triggered.


sumber: http://spac3crow.webs.com/apps/blog/show/3103662-extending-a-textbox-control-to-add-custom-properties-vb-net-2008


Numeric TextBox

Numeric TextBox
Imports System.Windows.Forms

public class NumericTextBoxDemo
   public Shared Sub Main
        Application.Run(New Form1)
   End Sub
End class

Public Class Form1
    Inherits System.Windows.Forms.Form

#Region " Windows Form Designer generated code "

    Public Sub New()
        MyBase.New()

        'This call is required by the Windows Form Designer.
        InitializeComponent()

        'Add any initialization after the InitializeComponent() call

    End Sub

    'Form overrides dispose to clean up the component list.
    Protected Overloads Overrides Sub Dispose(ByVal disposing As Boolean)
        If disposing Then
            If Not (components Is NothingThen
                components.Dispose()
            End If
        End If
        MyBase.Dispose(disposing)
    End Sub

    'Required by the Windows Form Designer
    Private components As System.ComponentModel.IContainer

    'NOTE: The following procedure is required by the Windows Form Designer
    'It can be modified using the Windows Form Designer.  
    'Do not modify it using the code editor.
   Friend WithEvents Button1 As System.Windows.Forms.Button
   Friend WithEvents NumTextBox1 As NumTextBox
   <System.Diagnostics.DebuggerStepThrough()Private Sub InitializeComponent()
      Me.Button1 = New System.Windows.Forms.Button()
      Me.NumTextBox1 = New NumTextBox()
      Me.SuspendLayout()
      '
      'Button1
      '
      Me.Button1.Location = New System.Drawing.Point(144120)
      Me.Button1.Name = "Button1"
      Me.Button1.TabIndex = 1
      Me.Button1.Text = "Do It!"
      '
      'NumTextBox1
      '
      Me.NumTextBox1.Location = New System.Drawing.Point(3256)
      Me.NumTextBox1.Name = "NumTextBox1"
      Me.NumTextBox1.TabIndex = 3
      Me.NumTextBox1.Text = "NumTextBox1"
      '
      'Form1
      '
      Me.AutoScaleBaseSize = New System.Drawing.Size(513)
      Me.ClientSize = New System.Drawing.Size(292266)
      Me.Controls.AddRange(New System.Windows.Forms.Control() {Me.NumTextBox1, Me.Button1})
      Me.Name = "Form1"
      Me.Text = "Form1"
      Me.ResumeLayout(False)

   End Sub

#End Region

   
End Class


Public Class NumTextBox
   Inherits System.Windows.Forms.TextBox

#Region " Windows Form Designer generated code "

   Public Sub New()
      MyBase.New()

      'This call is required by the Windows Form Designer.
      InitializeComponent()

      'Add any initialization after the InitializeComponent() call

   End Sub

   'UserControl1 overrides dispose to clean up the component list.
   Protected Overloads Overrides Sub Dispose(ByVal disposing As Boolean)
      If disposing Then
         If Not (components Is NothingThen
            components.Dispose()
         End If
      End If
      MyBase.Dispose(disposing)
   End Sub

   'Required by the Windows Form Designer
   Private components As System.ComponentModel.IContainer

   'NOTE: The following procedure is required by the Windows Form Designer
   'It can be modified using the Windows Form Designer.  
   'Do not modify it using the code editor.
   <System.Diagnostics.DebuggerStepThrough()Private Sub InitializeComponent()
      '
      'NumTextBox
      '

   End Sub

#End Region

  
   Protected Overrides Sub OnLeave(ByVal e As System.EventArgs)
      If Not IsNumeric(Me.TextThen
         MessageBox.Show("You must enter a numeric value!", _
            "Please try again....", MessageBoxButtons.OK, _
            MessageBoxIcon.Exclamation)
         Me.Focus()
      End If
      MyBase.OnLeave(e)
   End Sub
End Class
 
 
sumber: http://www.java2s.com/Tutorial/VB/0260__GUI/NumericTextBox.htm

Send HTML Email in VB.NET

In previous section, I introduced how to send email without specified SMTP server. In this section, I will introduce how to compose and send HTML email in VB.NET.
If you want to specify the font, color or insert pictures in your email, you should use Html email format instead of Plain text email format.
Remarks: All of samples in this section are based on first section: A simple VB.NET project. To compile and run the following example codes successfully, please click here to learn how to create the test project and add reference of EASendMail to your project.

[VB.NET Example - Send HTML email]

The following example codes demonstrate how to use EASendMail SMTP component to send email in HTML body format. To get the full samples of EASendMail, please refer to Samples section.
Imports EASendMail 'Add EASendMail namespace

Module Module1
    Sub Main()
        Dim oMail As New SmtpMail("TryIt")
        Dim oSmtp As New SmtpClient()

        ' Set sender email address, please change it to yours
        oMail.From = "test@emailarchitect.net"

        ' Set recipient email address, please change it to yours
        oMail.To = "support@emailarchitect.net"
        
        ' Set email subject
        oMail.Subject = "test HTML email from VB.NET project"
        
        ' Set HTML body
        oMail.HtmlBody = "<font size=5>This is</font> <font color=red><b>a test</b></font>"

        ' Your SMTP server address
        Dim oServer As New SmtpServer("smtp.emailarchitect.net")

        ' User and password for ESMTP authentication, if your server doesn't require
        ' User authentication, please remove the following codes.            
        oServer.User = "test@emailarchitect.net"
        oServer.Password = "testpassword"

        ' If your SMTP server requires SSL/TLS connection, please add this line
        ' oServer.ConnectType = SmtpConnectType.ConnectSSLAuto

        Try

            Console.WriteLine("start to send HTML email ...")
            oSmtp.SendMail(oServer, oMail)
            Console.WriteLine("email was sent successfully!")

        Catch ep As Exception

            Console.WriteLine("failed to send email with the following error:")
            Console.WriteLine(ep.Message)
        End Try

    End Sub
End Module
 
After you received the email by your email client, the body text is like this:
VB.NET html email sample
Of course, you don't have to write the HTML source body text in your application manually. You can build a html file with HTML tools and use ImportHtmlBody method to import the html file directly.
You can also refer to the htmlmail.* samples in EASendMail Installer. Those samples demonstrate how to build a HTML email editor and send HTML email with attachment or embedded images/pictures.
VB.NET html editor

sumber: http://www.emailarchitect.net/easendmail/kb/vbnet.aspx?cat=6

Senin, 19 November 2012

script type="text/javascript" src="http://imemovaz.googlecode.com/files/tripleflap.js">
script type="text/javascript" src="http://imemovaz.googlecode.com/files/tripleflap.js"></script>
<script type="text/javascript">
var birdSprite="https://blogger.googleusercontent.com/img/b/R29vZ2xl/AVvXsEj7RgCBUbYTfGGXq8sQREl4ClFWts5E7ZVtYDIRNk88yOmiYdBMDArPSij59yB1iy-CqAQ50Qb9bhbMxseoO17piZMdPXe9jzPyl84vf1GHUh99WH6zbQRxOwTMb8dKsxHCisnC3Jrb5cnZ/s1600/birdsprite.png"; var targetElems=new Array("img","hr","table","td","div","input","textarea","button","select","ul","ol","li","h1","h2","h3","h4","p","code","object","a","b","strong","span"); var twitterAccount = "http://twitter.com/anggaariwardana";var tweetThisText= "What up guys";tripleflapInit();
</script>